sábado, 16 de enero de 2016

Sobre de Fieltro en Forma de Corazón - Tutorial Gratis

Felt Heart Envelope - Free Tutorial


 Heart Felt Case Tutorial - Finished Case by casamagubako.com


Hoy les presento este tutorial con el que podrán hacer un sobre de fieltro en forma de corazón. Esta pieza sería ideal para dar dulces, chocolates o algún pequeño regalo a alguien especial en este próximo día de San Valentin. Además con solo cambiar los colores del fieltro, el sobre puede también usarse para dar recuerdos de bodas, baby showers, cumpleaños etc. La pieza mide 3.25" x 3.5" (8.25 cm x 8.89 cm), pero el patrón puede reducirse o agrandarse fácilmente para hacer el sobre en el tamaño que lo necesite.

Today I bring you a tutorial to make a felt heart shaped case/envelope. This case would be great to give treats or a small gift to someone special on this coming Valentine's Day. It can also be used as a treat bag for weddings, baby showers, birthday parties etc
by only changing the colors of the felt. The piece measures 3.25" x 3.5" (8.25 cm x 8.89 cm) but the pattern can be easily reduced or enlarged to meet your needs. 
On a side note, I designed this case at the suggestion of one dear customer, thank you Kathleen!


Heart Felt Case Tutorial - Finish Piece by casamagubako.com


Materiales:
* Fieltro en 2 o más colores
* Tul
* Hilo para bordar en colores que vayan con los colores del fieltro
* Hilo de algodón grueso
* Aguja regular y aguja de ojo grande
* Pegamento de tela o pistola de silicona
* Tijeras
* Perforadora de papel en círculo de 0.25" (6.3 mm)
* Cinta adhesiva
* Lápiz o lapicero
* Botones chicos (2)

Materials:
* Felt in 2 or more colors
* Tulle
* Embroidery floss in colors matching the felt colors
* Pearl cotton thread
* Needles: a standard needle and a large-eye needle
* Fabric glue or hot glue
* Scissors
* 1/4" circle paper punch
* Tape
* Pencil or mechanical pencil
* Small buttons (2)


Instrucciones: 

* Bajar el patrón, imprimirlo y cortar cada pieza dejando un pequeño margen alrededor como se muestra abajo. Con la perforadora de papel hacer dos perforaciones, una a cada lado del patrón #1.

Instructions:

* Download the pattern, print it and cut each template leaving a small margin all around as shown below. With the paper punch, make a hole at each side of pattern #1.


Heart Felt Case Tutorial - Preparing Patterns by casamagubako.com


* Pegar los patrones a los diferentes fieltros con trozos de cinta adhesiva. Cuando pegue el patrón #1 asegúrese de que la cinta cubra los dos orificios (esto es para que el patrón no se mueva cuando lo esté cortando). 
* Cortar las piezas de fieltro: cortar una pieza de cada uno de los patrones #1, 2 y 3. Cortar cinco piezas con el patrón #4. Cuando corte el patrón #1 tenga en cuenta que es más fácil cortar primero la forma de corazón en el centro y después la periferia. 
* Usar la perforadora de papel para cortar 3 círculos de fieltro en los colores de su elección. Estos círculos serán el centro de las flores. Algunas veces la perforadora no corta el fieltro muy bien, en este caso termine el corte con tijeras siguiendo la muesca que la perforadora hizo en la tela.
* Cortar un cuadro de tul un poco más grande que la pieza #1.

* Tape the patterns to the different felts. When taping pattern #1 make sure the holes at the sides are covered with tape (this is to keep the pattern from moving while cutting the felt).

* Cut the felt pieces: one piece each of patterns #1, 2 and 3, and five pieces of pattern #4. When cutting pattern #1, it is much easier to cut out the inner heart shape first and the outer edge next.
* Use the paper punch to cut 3 felt circles in the colors of your choice. These circles will be the flower centers. Sometimes the punch doesn't cut all the way through the felt, in this case finish the cut with scissors following the dent left by the punch on the fabric.
* Cut a square of tulle a little larger than piece #1.


Heart Felt Case Tutorial - Cutting Felts by casamagubako.com


* Aplicar pequeñas gotas de pegamento en la parte de atrás de la pieza #1 como se muestra abajo.

* Apply little drops of glue to the back side of piece #1 as shown below.


Heart Felt Case Tutorial - Closing Heart Opening by casamagubako.com


* Poner la pieza de tul sobre la pieza #1 con el pegamento. Dejar secar.

* Place the tulle piece over piece #1 with the glue. Let dry.


 Heart Felt Case Tutorial - Attaching Tulle by casamagubako.com


* Recortar la pieza de tul de modo que quede ligeramente más pequeña que la pieza #1.

* Trim the tulle piece in a way that it ends up being a little smaller than piece #1.


Heart Felt Case Tutorial - Attaching Tulle by casamagubako.com


* Use un hilo sencillo para coser puntos atrás al frente de la pieza #1 alrededor de la abertura en forma de corazón, uniendo el fieltro y el tul en esta área.

* With a single thread place a line of back stitches at the front side of piece #1 around the heart opening, joining felt and tulle in this area.


Heart Felt Case Tutorial - Stitching Opening by casamagubako.com


* Aplicar una mínima cantidad de pegamento en el centro de tres flores. Pegar un círculo de fieltro en cada flor.

* Apply a tiny amount of glue to the center of three flowers. Attach a felt circle to each flower. 


Heart Felt Case Tutorial - Glue Flower Centers by casamagubako.com


* Como paso opcional puede coser unos puntos de jareta vertical alrededor de los círculos para darle a las flores un acabado con más detalle.

* As an optional step you can place some appliqué stitches around each circle to give the flowers a nice finish.


Heart Felt Case Tutorial - Stitching Flower Centers by casamagubako.com


* Aplicar pegamento de tela o de silicona en la parte de atrás y en el centro de cada flor y pegarlas a un lado de la abertura en forma de corazón como se muestra en la foto de abajo. Dejar secar.

* Apply fabric glue or hot glue to the back side and center of the flowers and attach them to one side of the heart opening as shown below. Let dry.


Heart Felt Case Tutorial - Glue Flowers by casamagubako.com
 

* Coser puntos festón en el lado recto de las piezas #2 y #3.

* Place a line of blanket stitches along the straight side of pieces #2 and #3.


Heart Felt Case Tutorial - Stitching Back Pieces by casamagubako.com


* Poner piezas #2 y #3 sobre el lado de atrás de la pieza #1. La pieza #2 va por encima de la pieza #3. Coser unos puntos sujetadores a los lados (se quitarán más tarde) para mantener las 3 piezas juntas.

* Place pieces #2 and #3 over the back side of piece #1. Piece #2 should go over piece #3. Place a securing stitch at each side (they will be removed later) to keep the 3 pieces together.


Heart Felt Case Tutorial - Closing Case by casamagubako.com


* Coser puntos festón alrededor del corazón empezando en el centro y arriba. Cuando se acerque a alguno de los puntos sujetadores, córtelo y continúe cosiendo.

* Blanket stitch around the heart starting at the top and center. When you approach a securing stitch just cut it off and continue.


Heart Felt Case Tutorial - Blanket Stitching the Heart by casamagubako.com


* Coser un botón en el centro de las dos flores restantes.


* Stitch a button at the center of the two remaining flowers.


Heart Felt Case Tutorial - Stitching Buttons & Flowers by casamagubako.com


* Enhebrar la aguja de ojo grande con el hilo de algodón grueso y anudar el extremo suelto. Insertar la aguja por atrás y en el centro de una de las flores. Saque la aguja y el hilo al frente por debajo del botón. Esta pieza de hilo debe medir aproximadamente 6" (15.24 cm).

* Thread the large-eye needle with the pearl cotton thread and make a knot at the free end. Insert the needle at the back and center of one of the flowers. Bring the needle and thread out at the front of the flower under the button.


Heart Felt Case Tutorial - Adding Closure Thread by casamagubako.com


* Aplicar una generosa cantidad de pegamento de tela o de silicona en la parte de atrás de las flores con botón.

* Apply a generous amount of fabric glue or hot glue to the back side of the flowers with button.


Heart Felt Case Tutorial - Gluing Closures by casamagubako.com


* Pegar las flores con botón en cada una de las solapas del sobre como se muestra en la foto de abajo. Dejar secar.

* Attach the flowers with button onto each flap of the case as shown in the picture below. Let dry.


Heart Felt Case Tutorial - Attaching Closures by casamagubako.com


 * El sobre está terminado. Una vez que lo llene con dulces o lo que sea que quiera poner adentro, acomode las solapas en su sitio y pase el hilo de algodón grueso por debajo de los botones formando un 8 para cerrar el sobre.


* The case is finished. Once you fill it with candy or whatever you want to put inside, place the flaps back in place and pass the pearl cotton thread under the buttons forming an 8 shape to close the case.


Heart Felt Case Tutorial - Closing with Thread by casamagubako.com


Heart Felt Case Tutorial - Finished Case by casamagubako.com


Este tutorial es para uso personal, sin embargo usted podría vender estos sobres siempre y cuando agregue el debido crédito en la descripción del producto. Algo por el estilo de "Sobres de fieltro en forma de corazón hechos con un patrón de Casa Magubako en casamagubako.com". Gracias por respetar mi trabajo! :) 

This tutorial is intended for personal use, however you could sell these cases only if you add the due credit to the product's description. Something along the lines of "Heart case made with a Casa Magubako's pattern at casamagubako.com". Thanks for respecting my work! :)

domingo, 10 de enero de 2016

Ángeles: Un Nuevo Tutorial

Angels : A New Tutorial 


Saludos cariñosos desde este rincón del mundo!! Espero que las festividades de fin de año hayan sido de lo mejor para ustedes y sus seres queridos, llenas de alegría, paz, amor y deliciosos platillos! Mis mejores deseos para que este nuevo año les traiga mucho de todo aquello que les haga felices, que vean sus sueños hechos realidad y sobre todo que gocen de muchísima salud.

Warm greetings from this corner of the world !! I hope this past holiday season was great for you and your loved ones, filled with joy , peace, love and delicious dishes ! I wish for this New Year to bring you much of whatever makes you happy, that you can see all your dreams come true and most of all that you enjoy lots of good health. 


Felt Angels by casamagubako.com


Hoy quiero presentarles mi nuevo tutorial que como ya les había adelantado aquí es para hacer unos lindos angelitos en fieltro. Ha decir verdad, había programado publicarlo varios meses atrás a tiempo para las fiestas navideñas, pero no contaba con un par de contratiempos que me hicieron posponerlo más de una vez. Pero bueno, lo importante es que finalmente lo terminé y ya está disponible a la venta. Estos angelitos se pueden hacer en versión de niño y niña y están llenos de dulzura y "monura"... como ven me pinto sola para inventar palabras! :) 

Today I want to introduce you to my new tutorial which is about making some pretty little angels in felt. To tell the truth, I had scheduled its release several months ago just in time for Christmas, but I had some unexpected events that made me postpone the publishing day more than once. Well, what is important now is that I finished it and is now available for sale. These angels can be made as a girl angel or a boy angel and they are full of sweetness and cuteness.


Felt Angel Ornaments by casamagubako.com


El tutorial también da la opción de hacer la cara de los ángeles en una forma simplificada o en una versión con un poco más de detalle, todo de acuerdo al gusto de la persona que los hace y a su nivel de destreza en trabajos de costura. Y hablando de destreza, debo ser honesta y decirles que este proyecto definitivamente no es para alguien con cero experiencia en costura pues al menos se requiere tener cierta idea de cómo trabajar con fieltro y de cómo hacer los puntos básicos de costura a mano y bordado.

The tutorial also allows you to make the angel's face in a simplified or detailed fashion, according to the crafter’s taste and skills. And speaking of skills, I must say that this project is definitely not for someone with no experience in hand-sewing and embroidering. This project requires at least some skills working with felt and doing basic hand-sewing and embroidering.  


Felt Angel Pattern by casamagubako.com


El tutorial esta disponible en mi tienda en Etsy, mi website y mi tienda en Craftsy. 

Ya estoy trabajando en mi próximo proyecto y les adelanto que estará lleno de linduras, ya les daré los detalles.. También es muy probable que pronto me aparezca por aquí con una pequeña sorpresa, estén pendientes!

Hasta la próxima.. 


The tutorial is available at Etsy, my website and Craftsy.

I'm already working on my next project and I promise it will be full of beautiful creatures.. more details later.. Also, it is very likely that I will stop by soon with a little surprise, stay tuned!

Until next time..

martes, 1 de diciembre de 2015

Angelitos

Little Angels

Este año he tenido tres posibles diseños navideños para tutoriales: un ángel, la Sra. Claus y un duende. Con el tiempo que queda para Navidad creo que sólo terminaré uno de ellos, con un poco de suerte quizá dos.
 

This year I had three possible Christmas designs for tutorials: an angel, Mrs. Claus and an elf. With the time left before Christmas I think I will be able to finish only one, with a little luck perhaps two.


Ya empecé el ángel en versión de niño y niña.
 

I have already started the angel in a boy/girl version.


Sólo necesito trabajar algunos detalles menores y terminar de escribir las instrucciones.
 

I just need to work some minor details and finish writing the instructions.


Angel Tutorial - Girl Angel by casamagubako.com


Me encanta como están quedando estos angelitos y espero tenerlos listos pronto.

I love the way these little angels are turning out and hope to have them ready soon. 


Angel Tutorial by casamagubako.com


Las mantendré informadas..
Hasta la próxima!


I will keep you informed..
Until next time!


sábado, 17 de octubre de 2015

Tres Gatos

Three Cats

Una entrada rapidita para decirles que he agregado un nuevo tutorial a la colección de Casa Magubako. Es acerca de cómo hacer unos atractivos gatitos en tres versiones diferentes.

A quick entry to let you know that I have added a new tutorial to the Casa Magubako's collection. It is about how to make these good looking little cats in three different versions.


Cat Tutorial by casamagubako.com


El primero en la lista es un elegante francesito llamado François, tan serio y formal que hasta podría decirse que es medio estirado. François es por lo general muy callado, pero aun así siempre se ríe de las ocurrencias de sus dos amigos favoritos, Carmen y Spooky. 

First on the list is an elegant Frenchman named François, so serious and formal that some could find him a little stiff. He is usually very quiet although he always laughs at the occurrences of his two favorite friends, Carmen and Spooky.


Cat Tutorial - French Cat by casamagubako.com


Carmen es la divertida, risueña y relajada del grupo. Le encantan las flores y es muy femenina tanto en sus maneras como en su forma de vestir. 

Carmen is the fun, wiggly, happy-go-lucky girl of the group. She loves flowers and is very feminine both in her manners and in the way she presents herself. 


Cat Tutorial- Girl Cat by casamagubako.com


Spooky en cambio, es un poco tímido y despreocupado en su aparencia aunque no por eso deja de mostrar su gusto por lo oculto y misterioso. A Spooky le gusta soñar despierto y muy seguido se queda atrás mirando a la luna o disfrutando de lugares oscuros y tenebrosos. 

Spooky on the other hand, is a little shy and less aware of his appearance but still he often shows his taste for the unknown and mysterious. Spooky is a day-dreamer and more often than not stays behind staring at the moon or enjoying dark, somber places. 


Cat Tutorial - Halloween Cat by casamagubako.com


François, Carmen y Spooky no podrían ser más diferentes pero es muy probable que esa sea la razón por la que disfrutan muchísimo los momentos que pasan juntos. 

El tutorial está disponible aquí y aquí. Espero que les guste! Hasta la próxima..

François, Carmen and Spooky couldn't be more different but that's very likely the reason why they enjoy their time together so much.

The tutorial is available here and here. Hope you like it! Until next time..


domingo, 12 de julio de 2015

Abeja en Fieltro - Felt Bee


Felt Bee Tutorial by casamagubako.com


Hace algunos ayeres les dije que estaba trabajando en un nuevo tutorial para hacer una abejita en fieltro. Hoy puedo decir que por fín lo terminé! No sé por qué me ha tomado tanto tiempo el escribirlo y dibujarlo, quizá sea porque me he vuelto más exigente y quiero que todos los detalles salgan exactamente como los tenía planeados.. o quizá se deba a que estoy simplemente chocheando y haciéndome más lenta. Cualquiera que sea la razón de mi tardanza, lo importante es que el tutorial esta listo.. yaaaayy!! En serio que estos pequeños bichitos son de lo más dulces y se ven lindos todos juntos en esta guirnalda que arreglé bien rapidito.

Some time ago I told you that I was working on a new tutorial to make a little bee in felt.  Today I can say that I finally finished it! I don't know why it has taken me so long writing and drawing it, maybe because I have become a perfection freak and want all the details to turn out exactly the way I had planed them.. or maybe because I am just getting older and slower. Whatever the reason for this delay was, the important thing is that the tutorial is ready.. yaaaaayy!! Seriously, these little buggies are the sweetest and they look pretty all together in this garland that I quickly made.


Bee Garland by casamagubako.com


Pero no crean que esta abejita sólo puede hacerse como niña, pues también tengo la versión del varoncito.. sólo por cambiar la posición del moño la abeja niña se convierte en un sonriente niño.

But don't think that this little bee can be only made as a girl, because I also have the boy's version. By only changing the placement of the bow the girl bee becomes a smiley boy bee.


Felt Bee-Boy by casamagubako.com


Me encanta como quedaron las abejitas y por lo pronto ya tengo la mía colgada del espejo retrovisor en el auto. Me hace sonreír cada vez que la veo :)

I love the way my bees turned out and I already have mine hanging from my car's rear-view mirror. It makes me smile every time I see it :) 


Felt Bee Ornament by Casa Magubako


El tutorial lo podrán encontrar aquí y aquí:
The tutorial can be found here and here.

Gracias por la visita y hasta la próxima! :)
Thanks for visiting and until next time! :)    

viernes, 29 de mayo de 2015

Mariposas y más mariposas..

Butterflies and more butterflies..


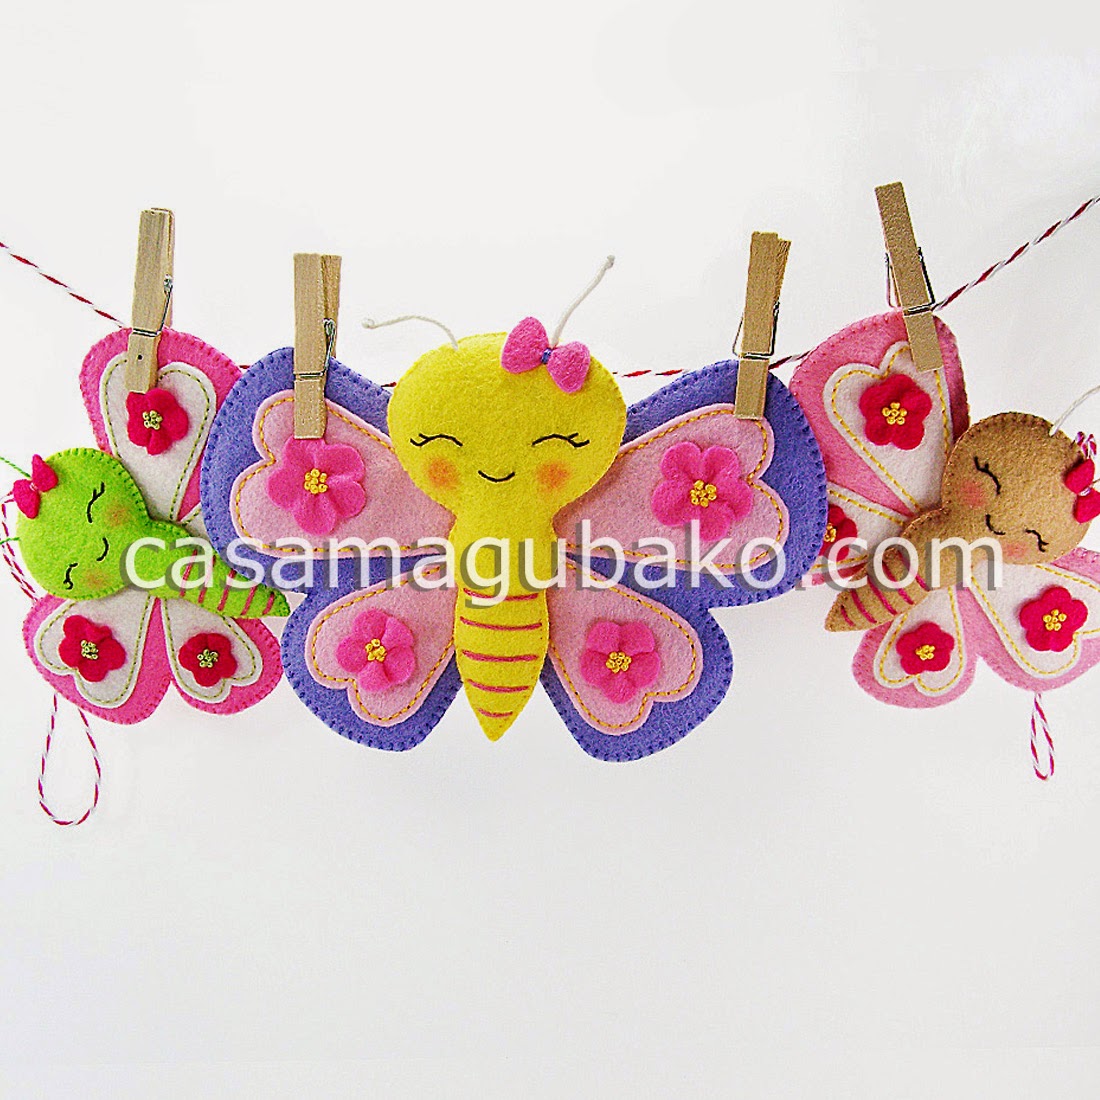
Felt Butterfly Tutorial by casamagubako.com


En una entrada previa les comenté un poco acerca de mis quehaceres diseñando una mariposa para un nuevo tutorial y hoy tengo el gusto de decirles que he terminado de escribir las instrucciones y también de dibujar...

In a previous post I shared with you a little bit about my behind-the-scenes work designing a butterfly for a new tutorial and today I have the pleasure to tell you that I have finished writing the instructions and also drawing...


Felt Butterfly Tutorial - Digital Images by casamagubako.com


..y fotografiar todos los pasos.        
..and taking the pictures of all the steps.


Butterfly Tutorial by casamagubako.com


El tutorial explica con mucho detalle el proceso para hacer la mariposa y también incluye los patrones en dos tamaños. Este bichito es muy versátil y tiene una gran cantidad de usos: 
  • como un ornamento para colgar de la manija de las puertas, de una lámpara o del espejo retrovisor del auto para mencionar algunos ejemplos
  • como adorno para un móvil de bebé
  • como parte de una corona decorativa
  • para adornar una guirnalda
  • para hacer un llavero
  • como un broche 
  • como parte de un organizador de ganchos del pelo  

The tutorial explains in detail the process for making the butterfly and includes the patterns in two sizes. This little bug is very versatile and can be used in many ways:
  • as an ornament to hang from a door knob, a lamp or a car's rear-view mirror just to mention a few examples
  • as an embellishment for a baby mobile
  • as part of a wreath
  • to adorn a garland
  • as a key-chain
  • as a brooch
  • as a hair-clip organizer

Ahora que si reduce o aumenta el tamaño de los patrones las opciones se multiplican y la mariposa podría ser: 
  • un adornito para un gancho de pelo
  • adornos para coronar pastelitos para una fiesta 
  • un juguete
  • una almohadita
  • una pieza de decoración para el cuarto del bebé 
y la lista sigue, la imaginación es el límite!


Now, if you reduce or enlarge the size of the patterns the options multiply and the butterfly could be:
  • a little embellishment for a hair-clip
  • embellishments for cupcake toppers
  • a soft toy
  • a little pillow
  • a decor piece for a nursery
and the list go on, your imagination is the limit!

El tutorial está disponible en mis tres tiendas:

Website: http://www.casamagubako.com/collections/tutorials/products/felt-butterfly-digital-pattern-pdf-file 

Etsy:https://www.etsy.com/listing/228892413/felt-butterfly-tutorial-digital-pattern?ref=shop_home_active_5

Craftsy: http://www.craftsy.com/pattern/sewing/toy/hand-stitched-butterfly-pattern/144624.

Espero que lo disfruten!!
Hasta la próxima :) 

The tutorial is available in my three shops:

Website: http://www.casamagubako.com/collections/tutorials/products/felt-butterfly-digital-pattern-pdf-file 

Etsy: https://www.etsy.com/listing/228892413/felt-butterfly-tutorial-digital-pattern?ref=shop_home_active_5
 
Craftsy: http://www.craftsy.com/pattern/sewing/toy/hand-stitched-butterfly-pattern/144624.
 

Hope you enjoy!!
Until next time :)